The Beauty Light and More
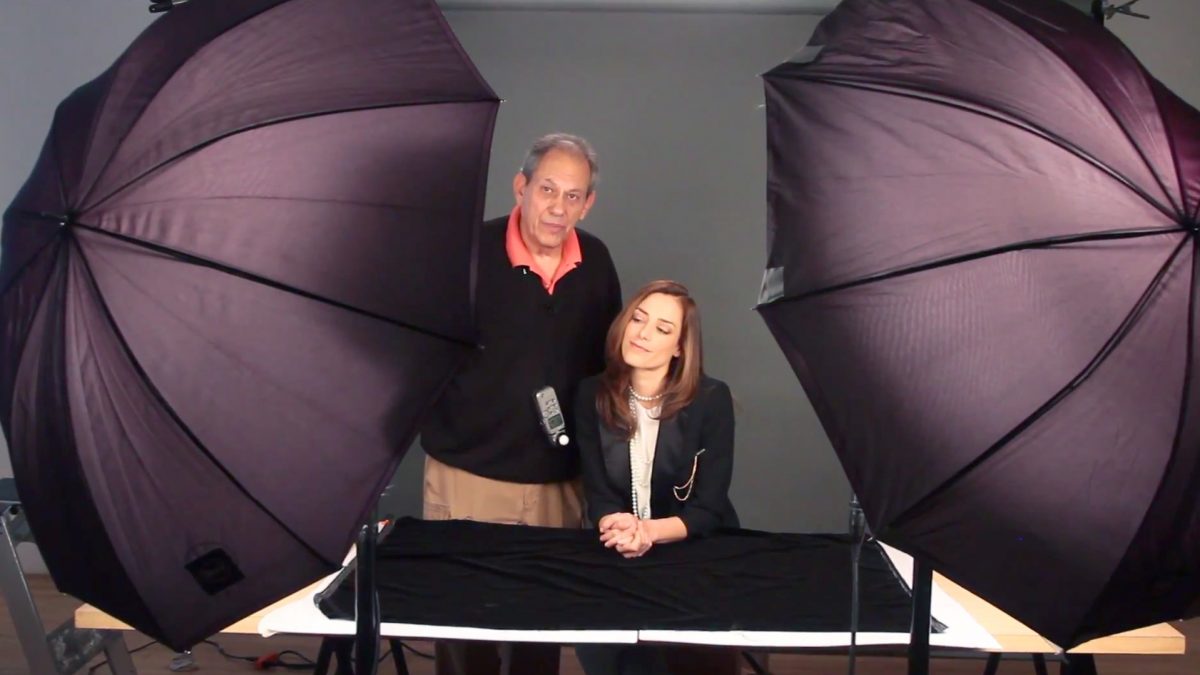
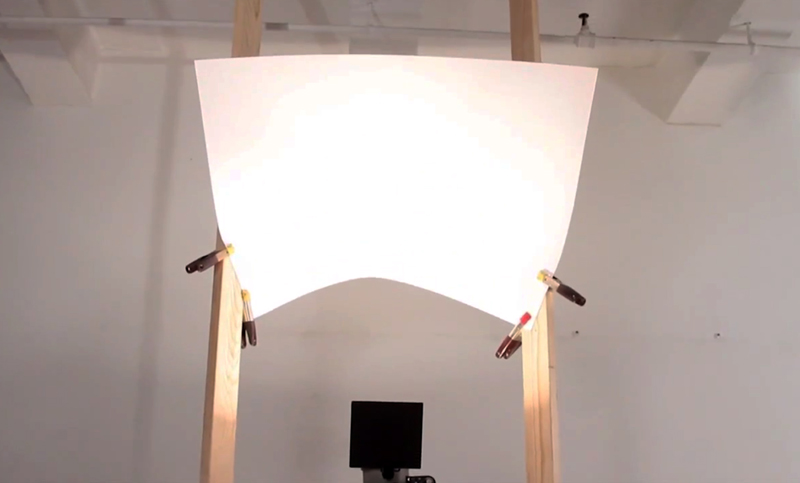
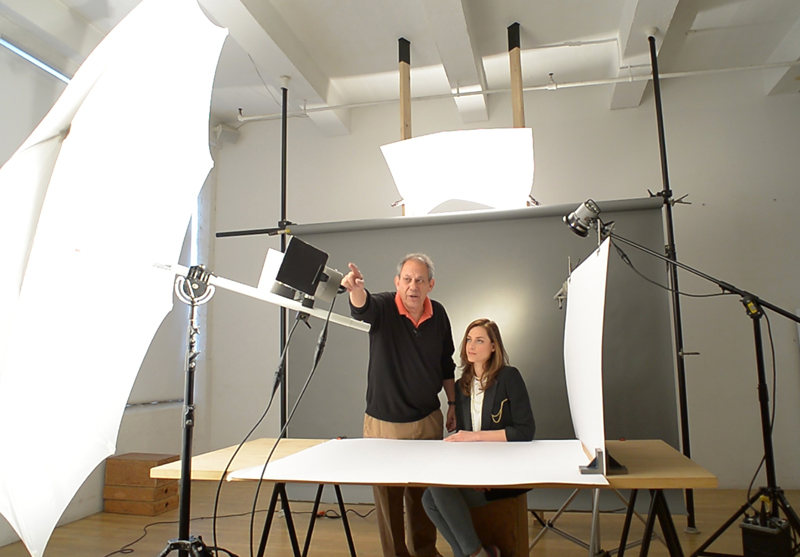
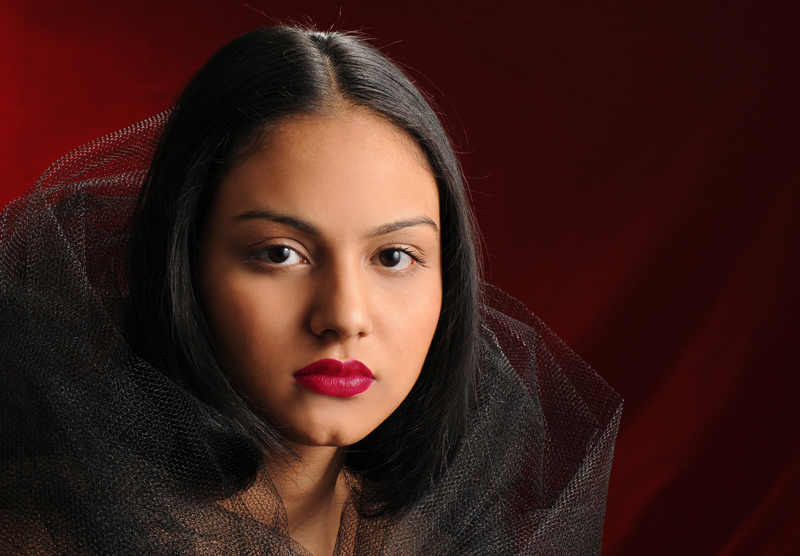
This is the first tutorial of four that is going to focus on portraiture. We are going to use two fill cards to create a different kind of portrait lighting. The first card will be used to create a light I’ve named a “scoop” because it scoops up the rays of a light from a flash head behind the background and throws it over the top of the background to light our subject’s hair. The second fill card is going to be used to create a type of lighting called a beauty light. It’s called a beauty light because the position of the lights and the fill card we will be using will minimize both vertical and horizontal wrinkles and other imperfections on our subject’s face.
This tutorial also will be a short rant directed at all the computer, and software designers who want to force the words portrait and landscape into our brains to replace the words vertical and horizontal. While it’s condescending of them to think we can’t understand the words vertical and horizontal, an even more detrimental side effect is the fact that portrait poses meant to be shown on a computer screen or in a video might be better if they are composed in a horizontal format to better fit their intended use. No matter what anyone tries to tell you, all portraits do not have to be framed as verticals, and all landscapes do not have to be framed as horizontals! Whether we frame a portrait as a vertical or a horizontal, and whether we frame a landscape as a horizontal or a vertical, is decided upon by the image’s content and the image’s intended use!
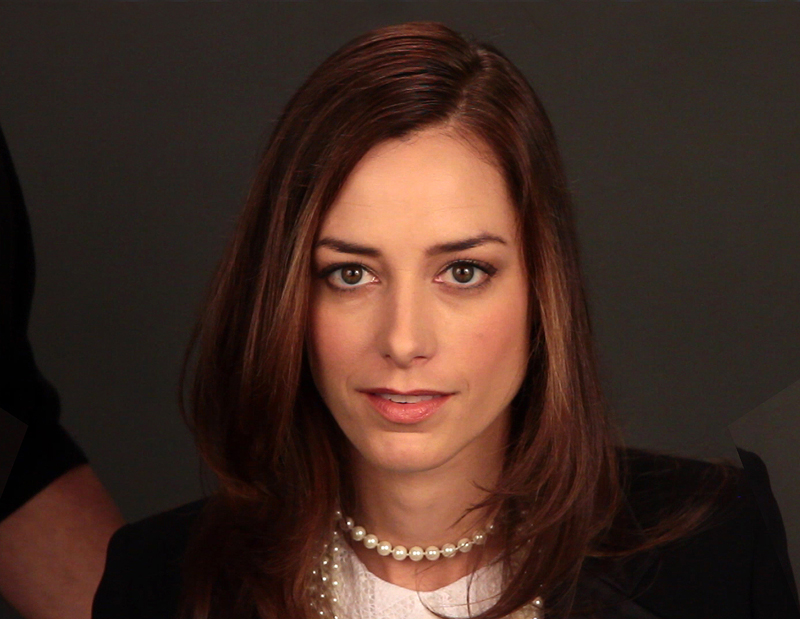
Finally, we are going to show you how very slight changes in the position of our subject’s face can accentuate or minimize different features on that subject’s face. Let’s begin!
Set Shop Tutorial Checklist
Call (800) 422-7381 or visit us online to purchase any of the products used in this tutorial.
- Showcard / Fill Card: These Black/White showcards are 30″ x 40″ and are perfect for masks, gobos or reflectors. They also make good backgrounds and cue cards. There is a 5 card minimum required when ordering for shipping. Mix and match colors and sizes welcomed.
- 2×4 Wood: Our 12 foot tall 2×4 is perfect for use with our Timber Toppers to create a structure to hold your SETPAPER, Fabric Backgrounds of reflectors.
- A Clamps: Classic metal “A” clamps with orange grips.
- Timber Toppers: Timber Toppers are spring-loaded grey metal caps, slid over the end of 2×4’s cut slightly shorter than ceiling height, with both then wedged between floor and ceiling to jointly create a sturdy support for studio backgrounds, lights, and so on. They were also quite handy for creating temporary shelves (primary use outside photography) and similar. Rubber gaskets helped to avoid marring the ceiling.
- Manfrotto Clip: Great for creating quick flexible joints on showcards or foamcor.
- 2A Thunder Grey SETPAPER: Our SETPAPER is non-reflective, high-quality surface that is made in the USA. Ideal for photo backgrounds, this paper also works great for displays, trade show booths, and banners. Our 9ft rolls come in 51 colors are all 36ft long and wrapped in a plastic sleeve to keep moisture out. The 9′ Setpaper requires an additional shipping tube for all out-of-town orders. Please select it as an option below and refer to our Shipping Policy in the Information section for more details.
- Duvetyne: Sold by the yard (3 Feet) our black duvetyne also known as commando cloth is a solid 8 oz fabric. At 54″ wide this material is ideal for making custom flags or gobos, as a table top black background . This can be used to block out unwanted light. Sold in full yards only. Need 50+ yards, call us for better pricing. Ships rolled or folded depending on yardage. Please specify either or on the comments section of your shopping cart.
- Umbrella: Take control over the harsh brilliance of naked sunlight. Open and tilt its wide, wide expanse to create a setting free of glare but filled with incomparble natural light. For Fashion, for Portraiture for Nature Photography, it’s the perfect outdoor picture-making tool.

Steve Sint